
How Buffing Works: The Stages of Paint Correction

Introduction
Buffing, or paint correction, is a highly controlled mechanical process used to enhance the depth, gloss, and clarity of a vehicle’s finish. Rather than a simple “sanding” method, it is the precision removal of microscopic layers of clear coat using abrasive chemicals and specialized rotary friction. When executed correctly, buffing eliminates common cosmetic defects—such as swirl marks, haziness, light scratches, and oxidation—by subtly reducing the surface until the imperfections are smaller than the human eye can perceive. The fundamental mechanism relies on generating controlled friction and heat between a polishing compound and the clear coat, effectively smoothing the surface at a molecular level.
The Physics of Paint Correction
At its core, buffing is a thermal and mechanical smoothing process. Paint consists of multiple layers, the most important being the outermost clear coat. Defects like swirl marks are not physical chips; they are microscopic scratches created by improper washing that create a dull texture. Buffing works through these steps:
- Friction and Heat: A polishing pad (e.g., wool, microfiber) is spun against the paint. This rotation generates heat, which softens the polymer structure of the clear coat slightly.
- Mechanical Abrasion: Polishing compounds contain ultra-fine abrasives. As the pad moves, these microscopic abrasive particles physically cut and remove a minute amount of the paint layer.
- Surface Refinement: The repeated, controlled application gradually reduces the depth of the scratch or the “peaks” of a swirl mark until the surface becomes perfectly flat and uniformly smooth. This smoothness allows light to reflect cleanly, resulting in a deeper, more vibrant gloss.
Understanding the Paint Layers and Buffing Limits
To understand the efficacy of buffing, it is critical to know the structure of automotive paint. Car paint generally consists of three distinct layers:
- Primer: The base layer that adheres the system to the body of the car.
- Colored/Cosmetic Paint: This layer provides the specific hue. It sits beneath the protection.
- Clear Coat: This is a tough, resinous protective film applied over the color. It is designed to absorb minor environmental damage and maintain a reflective finish.
The thickness of the clear coat is the single greatest determinant of buffing success. The clear coat acts as a sacrificial shield. If a cosmetic flaw (such as a light swirl) is confined entirely within this clear coat, buffing can effectively remove it. However, buffing is an incremental process, and if a scratch is deep enough to penetrate the clear coat and reach the colored or primer layer, the abrasive action of buffing will simply deepen the scratch, as there is no protective layer left to smooth. In these cases, specialized touch-up paint is required.
The Three Stages of Paint Correction
Effective paint correction is rarely a single-step process. It is a sequential procedure, moving from more aggressive removal of damage to delicate refinement. This multi-stage approach ensures that the surface is completely uniform and polished without unnecessary wear.
1. Cutting (Defect Removal)
The first stage involves using heavier, more aggressive compounds. The goal of cutting is foundation—to aggressively reduce the “high points” on the surface, such as deep scratches and oxidized, dull areas. This stage removes a noticeable amount of paint but is essential for establishing a corrected starting point.
2. Leveling (Refinement and Consistency)
Once the primary defects are reduced, the surface needs to be leveled. Even after cutting, residual micro-texture and minor inconsistencies remain. The leveling stage uses slightly finer compounds to ensure the entire surface is perfectly uniform and smooth, transitioning the paint from “corrected” to “uniform.”
3. Refining (Clarity and Gloss)
This is the final, meticulous stage. Using the finest polishing agents, the focus shifts entirely to micro-marring and enhancement. Refining does not remove deep scratches; instead, it fills in the remaining microscopic textures and maximizes the optical density of the clear coat. The result is a mirror-like finish that maximizes paint depth and reflectivity.
Choosing the Right Tools and Chemicals
The success of the buffing process depends on matching the abrasive to the defect and the machine to the task.
Compounds vs. Polishes
A key distinction lies in the chemical formulation:
- Compounds: These are harder, more aggressive formulations containing larger abrasive particles. They are strictly used in the Cutting stage to physically remove deep defects and restore heavy gloss.
- Polishes: These are softer, less abrasive formulations with extremely fine “polishing” agents. They are reserved for the Leveling and Refining stages to smooth out residual texture and achieve a high-gloss, mirror finish.
Buffers and Pads
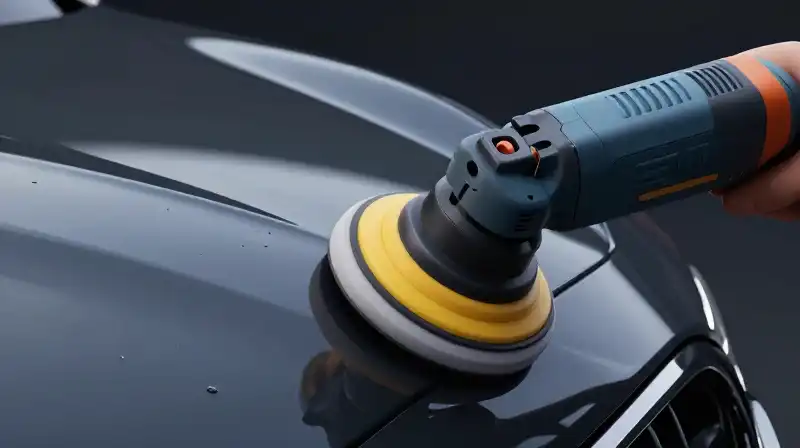
The machine—whether a rotary or a dual-action (DA) polisher—determines the pressure and consistency of the application. The pads interface with the machine and have specific applications:
- Cutting Pads: Usually made of coarse wool or specific foam, these pads are designed to hold more abrasive and provide high-energy transfer for defect removal.
- Finishing Pads: Often microfiber or fine foam, these pads provide a gentle, controlled friction ideal for the final refining stage to enhance clarity.
Practical Considerations and Common Limitations
Understanding when buffing will fail or cause harm is crucial for avoiding costly mistakes.
When Buffing Isn’t the Solution
Buffishing cannot correct damage that involves the underlying layers or parts that were not affected by clear coat damage:
- Deep Chips or Scratches: If the paint material itself is removed and the metal or primer shows through, buffing cannot repair this structural loss.
- Porosity or Paint Failure: If the paint material itself is chemically deteriorated (not just scratched), the paint structure is fundamentally compromised, and buffing is a superficial fix at best.
- Burn-Through: This is a critical error where too much clear coat is removed, exposing the color layer in a faded, “stripped” appearance. This is avoided by maintaining steady, consistent pressure and trusting the chemical concentration of the product rather than excessive machine speed.
Achieving and Maintaining the Restoration
Buffing completes the surface refinement, but it is not the final step in preservation. Once the paint is corrected, the finish is vulnerable. To lock in the hard work, a post-buff treatment is necessary. Applying a high-quality sealant or wax creates a sacrificial layer on top of the smooth clear coat. This added film offers immediate protection against light environmental contaminants, UV damage, and chemical etching, ensuring the paint retains its newly corrected depth and gloss for a longer duration.
Synthesis: Buffing Strategy
To approach paint correction effectively, view it as a layered strategy of removal and refinement. Always begin by establishing a clean surface; washing and decontamination (clay barring) must occur before applying compounds. The guiding principle is to start aggressive and end precise. Never skip the initial cutting stage if deep flaws are present, as trying to “polish out” a deep scratch will only result in a hazy finish. The decision to buff must be predicated on the depth of the flaw relative to the thickness of the clear coat—if the scratch is structural, buffing is merely an illusion of correction; if it is purely cosmetic, buffing is a powerful method of restoration.
How to Perform Professional Paint Correction (Buffing)
Preparation
Always begin by establishing a clean surface. Wash and decontaminate the vehicle (e.g., using clay barring) to remove any surface contaminants before applying compounds.
Cutting (Defect Removal)
Use heavier, more aggressive compounds and cutting pads to aggressively reduce high points on the surface, such as deep scratches and oxidized, dull areas, to establish a corrected starting point.
Leveling (Refinement and Consistency)
Once primary defects are reduced, use slightly finer compounds to ensure the entire surface is perfectly uniform and smooth, addressing residual micro-texture left by the cutting stage.
Refining (Clarity and Gloss)
Use the finest polishing agents and finishing pads to meticulously fill in remaining microscopic textures and maximize the optical density of the clear coat for a mirror-like finish.
Protection
Apply a high-quality sealant or wax post-buff treatment to create a sacrificial layer on top of the clear coat, protecting the newly corrected finish against environmental contaminants and UV damage.
Related Articles